Showing posts with label finished. Show all posts

Friday, May 17, 2013

Finished: DIY Play Tent


Hi.  My name is Jenny, and I like to make stuff.  Yep, I'm a compulsive DIYer.  Which means that when Ruby's birthday rolled around, I wanted to make her something.  Actually, I wanted to make her multiple somethings (a play fort, a dolly, a quilt), but since I don't have oodles of spare crafting time, I had to whittle my list down to just one thing.  And that, my friends, was this play tent.

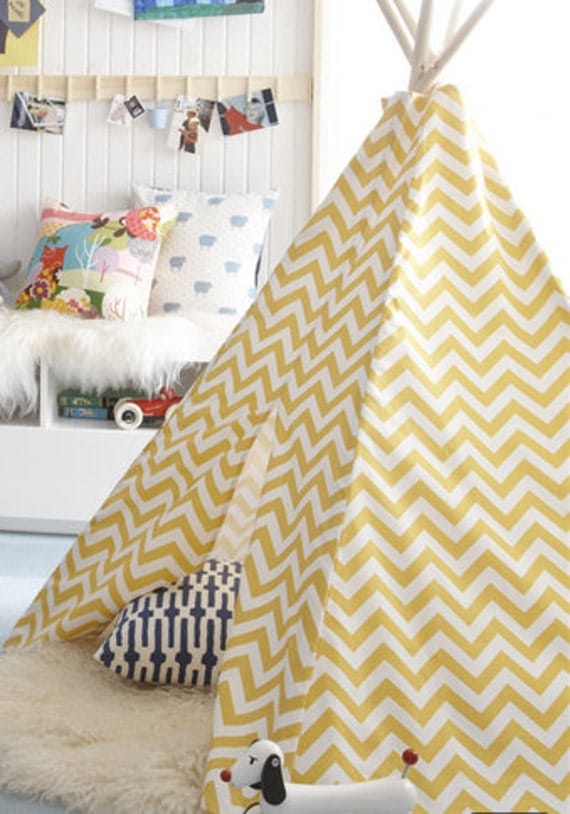
Well, ok, if we're being honest, I wanted to buy her a play teepee.  Like this:

via

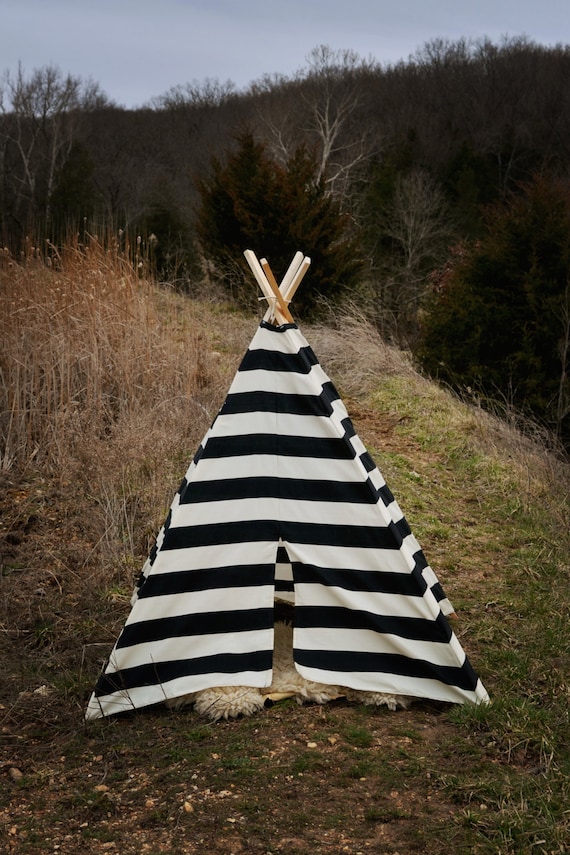
Or, this:
via

But those weren't exactly in my budget, plus there was the compulsive DIYer side of me mentioned above.  So DIY it was!  

And then, what should happen?  In my blog reader came along a post from Jessie at Cape 27.  She made a play tent for her daughter's first birthday.  It was a sign!  I liked the idea of a tent because the construction was much easier, and called for much less fabric.  I like that Jessie and I both had the idea of making some sort of play fort for our girls' birthdays.

It is the perfect place for reading a book.


Or, you know, just hanging out.


Jessie's post led me to the tutorial found here on the Cakies blog (what a great name).  I had the guy at Home Depot cut the molding to size for me right there in the store (Did you know they will do that for you?  They totally will, especially if you bring your baby in a tutu and silver mary janes...  Not that I did that.).  And I had my dad drill the holes on his drill press.  Because he has a drill press, and I do not even own a handheld power drill.  So, thanks, Dad!


The cover was sewn out of some awesome Ikea fabric that I found.  Because it was directional, I had to cut my piece first, then flip it around and sew it back together, so that the print would be right side up on both sides.  This means that there is a seam running down the top of the pole (which is no big deal at all).  Then I just hemmed all the edges and attached the elastic as per the directions.  

Seriously, check out these moose!  Ruby loves them.  I knew she would.  She can see them through the fabric when she's in there and points at them.


I did have to make one slight alteration to my tent.  When the fabric was draped over the center pole, and the corner elastics secured, it was still a little too... drapey.  I was prepared for this, as Jessie talked about having that problem when she made hers too.  Her solution was velcro.  While a great idea, I wasn't sure I wanted to go that route.  I wanted the cover to be fully washable, and I wasn't sure that self-adhesive velcro would hold up in the wash.

So, instead, I came up with the (brilliant) idea to add some ties.


I cut 8 (4 for the front and 4 for the back) 18" pieces of ribbon that I already had on hand from birthday party projects.  Measuring 1/3 of the way from the middle seam and bottoms (which was 14" on my tent), I simply stitched the middle of the ribbon where the existing hem stitching already was, making sure to sew back and forth several times for strength.


After tying them on, the tent was not droopy at all!  Yay!  And the ribbon is totally machine washable, so if anything ever gets on the cover that shouldn't be, I can just wash it right up!  

I also took one last page out of Jessie's book (seriously, I am SO glad she made that post!) and purchased one of Ikea's famous faux sheepskins to throw in there.  It makes it super cozy, and yes, I do like to go sit in there sometimes, too.

"Whaaaat?  Mama, you don't belong in my play tent!"

Now go make one for yourself your little one!  I anticipate we'll get a ton of use out of ours.  We already use it pretty much every day.  Just make sure that if you set out to photograph your little one in there, that you do NOT accidentally let her giant silver mylar #1 balloon float up to the top of your 2 story ceiling...


Not that that happened to us...

Wednesday, February 27, 2013

DIY Cloud Mobile

One of my goals as of late, has been to put more tutorials here on the ol' blog.  I'm pretty crafty by nature, and usually when I see something I like, I do a mental scan to see if it's something I can make myself.  Of course, it's also been my goal to finish the nursery before Ruby goes off to college.  Then the Youngsters issued their seasonal Pinterest challenge, and that was just enough to light a fire under my buns.


You'd think that being a Seattlite, I'd be cloud-averse, but nope.  Upon checking my Pinterest board, I noticed I had several inspiration pictures of cloud mobiles pinned already.

sources: 1, 2, 3, 4

Looking at the above images, I knew that this was a project in the scope of my (and most people's ability), and as an added bonus, I had a lot of the supplies already.  I only spent about $5 to get the remainder of what I needed.  None of these images had tutorials, so why not make my own?

First, gather your supplies.


It would be wise to make a template of sorts for your clouds and drops.  I made mine out on graph paper, so I could keep things somewhat symmetrical (especially for the drops).  You'll also need felt in white and several coordinating colors, thread to match, polyester fiberfill, a 12" embroidery hoop (just the inner circle, craft paint, fishing line or clear beading string (which is what I used, since that's what I found at the craft store), a needle for hand sewing, and an eye hook or cup hook to hang it.  I also used scissors (duh), a cheap foam paint brush, some hot glue, and an air-soluble marker.

The first thing you want to do is paint your hoop.  I learned the hard way that spray paint on a hoop is NOT the way to go.  I couldn't really get it on the sides, so I switched over to white craft paint.  Sorry that part is not pictured.  I actually decided to make this tutorial after I was already finished!  I think you all know how to paint, though.

Using your templates that you made, cut out six cloud pieces and 18 drop pieces.  If you're using all different colors like I did, make sure your fronts and backs are matching.  I found it easiest to trace the clouds first (this is where I used my air-soluble marker, but you could use a pencil), but for the drops, I just held the template on there and cut around.

Once you have your pieces, it's time to start stitching.


Start on the inside of the two pieces, to hide your knot.  Make sure you're using thread that matches the color of your clouds/drops.

Side note: I had every color thread I needed except for orange.  I really didn't want to go buy orange thread for one little drop, but I had a genius moment.  I threaded up my needle with the right length of yellow thread, then ran an orange sharpie over the length of it!  It worked (and matched) perfectly!

Anyway, continue sewing around until you have about a thumbs width left of space to go. 


I found that starting my thread in that particular spot (about 1/3 of the way from the top) made it easiest to stuff.  Which is your next step.  Stuff the drops as much as you like...


Stop to take a picture of your sweet doggie when she wanders into your work area...


And stitch that bad boy the rest of the way closed.


To hide this knot, place your needle between the two layers of felt (as shown above), and pull through. Knot your thread, then point your needle down between the layers and push it out through the puffy part of the drop.  Like so:


Pull your thread all the way through, a little bit tightly, and snip your thread.  When you let go, the tail will suck back into the stuffing and your knot will be hidden!

Repeat those steps for all of the drops and the clouds.  The process is exactly the same for the clouds, only you'll want to leave a slightly larger space for stuffing.

Once you have three stuffed clouds and nine stuffed drops, it's time to put them together.  Lay out all of your pieces and decide on a color arrangement for the drops that looks good to you.  I made sure I had none of the same color per cloud, and that none of the repeating colors were in the same positions (so, like, one light pink was centered, and one was on the side). 

Now cut a length of your fishing line.  Knot one end and thread your needle.  Find the bottom center of 
a drop and separate the two layers of felt (like you did when you were about to knot your colored thread).  Insert the needle there and finagle it up through the center of the drop so that it comes out at the point in between the two layers.  Pull it all the way until the knot reaches the felt.


You can juuuuust barely see the clear knotted fishing line in the photo above.  We don't want to see it at all, so gently tug the string until the knot pops into the drop.  You don't want to pull it completely through and out, so once it pops through the bottom, stop.

Your needle should still be threaded with the fishing line, now with a drop dangling at the bottom.  Pick up a cloud.  Find the desired location of where you want your drop to hang, and make a few stitches right on top of the white ones you did when you were sewing your cloud together.  The fishing line is slippery, so pull the string only to the desired length of your drop (I made my middle drops hang a little longer and just eyeballed the side ones until they were about even with each other.

Just like you did before, you're going to hide your knot.  Stick the needle through one layer, knot, and push it up into the middle of the cloud, then out.  Pull a little bit and cut your string so that it sucks back inside.  Knot hidden!  Repeat with all of the remaining drops.

To attach the clouds to the hoop, first I did a bit of math.  I wanted them evenly spaced around my hoop, so I found the circumference (12" x 3.14 = 37.68), but then divided it by 3 (since I have 3 clouds) to get 12.56".  So, I needed to hang my clouds roughly every 12.5".  Since pi is pretty close to 3, you could just use the diameter and hang them 12" apart, but one section would obviously be a little bigger.  Have I lost you yet?  =)  Just measure around the hoop and make little marks every 12.5".

Cut a long piece of fishing line and attach it to the top of the cloud with a couple of stitches and a knot (use our now-familiar knot hiding technique).  Wrap the other end of the line around the hoop at your mark, and tie a knot.  I wrapped mine around a few times for strength and to get a length I liked.  Then, because the end was sticking out a bit, I secured everything with a dab of hot glue.


Same thing goes for the other two clouds, but I varied the length of the strings, so I had a short, medium, and long (they ended up at 5", 7.5", and 10").

Now we need to make it hang.  I cut three really long pieces of fishing line.  I just looped it under at the same spots where the clouds were attached, and tied a knot (see pic above).  Once I had my three double-strings, I grabbed them all and, evenly as I could (I held it up to check for balance), tied them all together in the middle.

I knew I needed to make some sort of loop to make it hang.  After rummaging around, I found that I only had an eye hook.  If you're using a cup hook, you can just make the loop and hang it afterward.  If you use an eye hook, like me, thread all 6 pieces of your string through the eye, then knot them all together by your first knot.  Pull very tightly to make sure the knot is secure (this string is slippery!) and trim the ends if they are really long.

Here's where I ran into a problem.  How was I going to hide the ends?  I decided to cover them up with a little heart "cloud".  I cut two identical hearts out of white felt (about 1.5" across).  I started at the top and sewed half-way around, then sandwiched the heart around my knots, tucking the ends of the string in too.  I added a little bit of poly-fill here too, for good measure, then continued stitching my way around.


Screw your hook into the ceiling, and you're done!  Stand back and admire your work.


Admire the little whimsical, hand-stitched details...


Stop and take a picture of your adorable baby's crazy bed-head...


And admire some more.


Ruby just loves it.  Whenever we're by her crib, she points or reaches out for it, and loves to stare up at it when she's laying in bed.

I should say that I don't actually let her touch it, because I don't want the screw to loosen.  Our house is rented, so I did not put in an anchor or find a stud.  The mobile is very light, so I'm confident it will not come down on it's own, and it's high enough up that Ruby can't reach it on her own.  If you're worried about safety, though, anchor yours.  Still, with the strings, it shouldn't be hanging down where baby can grab it anyway (which is true of any mobile).

If you have any questions, please leave a comment.  Like I said, I decided to make this tutorial after I completed mine, so I didn't have pictures of every step.  If anything is confusing, please let me know!

There are lots of other great crafty projects linked up already, too, so go check out what everyone else made!
Thursday, February 14, 2013

Finished - Ruby's Name Quilt

On Saturday Mr. G took Ruby to visit his dad.  I stayed home.  It was the first time I've been alone in my house since she was born.  I've left her before, of course, but it was always for me to go do something fun, and I knew she was safe at home with her daddy.  This time was different.  Mr. G's parents do not live very close to us, and he so rarely even puts her in the car that I had to make sure he actually knew how to buckle her in the car seat.  Yikes.  Needless to say, the experience was much harder on me than it was on her.

BUT

It left me with about 3.5 hours to get. stuff. done.  The first thing I did was do some spray painting.  Can't do that with her around!  But then I got my sewing machine out, and my buns in gear.  Waaaaaaaay back in April, once I was sure we knew what we were going to name our girl, I had this big idea of making a this quilt with her name on it, and taking a picture of her on the quilt at the hospital to "reveal" her name to the world (since we didn't tell anyone the name before she was born).


That would have been pretty awesome, had I finished the quilt.  However, she came a couple of weeks early, and I ran into TONS of problems making this quilt.  The biggest problem being that there is an error in the pattern.  It calls for one yard of fabric for the backing.  So that's what I ordered.  Yeah, it wasn't enough.  And it wasn't until I did the math (adding the dimensions of the front pieces) and read the comments on the pattern that I figured it out.  But I was still short fabric.

Then, my amateurish quilting skills, plus my mediocre machine that really isn't even supposed to have a walking foot, let alone quilt (it's like, a $60 one from Walmart), led to some frustrating pulling of fabric which left me even shorter on the back.

Short story long, what should have been a simple quilt turned out not so, and I've been too frustrated with it, and too busy with my girl to do anything about it since I started it last spring.  I've been itching to finish it though, so when Mr. G gave me the gift of time...


I knew just what to do with it.


I will admit, I didn't finish it while they were away.  But I did manage to MacGyver/repair the spot with the weird pulling, finish the quilting, make the binding, machine attach it to the front, make letter templates for the name applique (I just freehanded them on graph paper, rather than download the font in the pattern), and iron on interfacing and cut out the letters before they got home.  Not too shabby.


Over the course of the last few days, I hand-stitched the binding down to the back after Ruby was in bed.  Tuesday I managed to sew down the applique, and by Wednesday morning it was all washed up and crinkly, ready to use, just in time for Valentine's Day.  Yes, I decided that this would be my V-day present to her.  Making that my goal helped motivate me to just get it finished already!


There is something soooo satisfying about finishing a quilt.


She thought it was pretty cozy too.


Here's the back.  The color looks a little off with that pink, but really, it is lovely.  See that strip of coordinating fabric?  Yeah.  That's not part of the pattern.  That was added out of necessity after the pattern left me short of fabric.  Boo.  If you look really close, you can see my MacGyver spot too.  Don't look too close. ;)


The border, backing, and applique fabric are from Heather Bailey's Pop Garden line.  The middle is Kona Cotton white, and the binding is Kona chartreuse (I'm pretty sure, anyway).  I used white Gutermann 100% cotton thread and quilted it in straight lines about 1.5" apart.  The batting is Warm & White.  

Detail shot...  With some adorable baby feet:


Oh, yeah.  This is what happens when you're too busy taking pictures of a quilt, and not paying attention to a baby:


It's all fun and games until Mommy has to clean it up.

Wednesday, September 26, 2012

Free DIY Hair Bow Holder

An alternate title for this post would be, "OMG, I finally made something!"

See, I'm pretty crafty, or at least I try to be.  I like making stuff, and I get excited when I want something, but can make it cheaper.  And to my exact colors/specifications.

When you have a baby that doesn't nap, however, it's kind of hard to get anything done.  Which is why her two quilts remain unfinished on the dining room table.  And let's not even talk about the one I started for Mr. G two Aprils ago...

Anyway, I'm slowly but surely finishing up the nursery, and part of that included hanging a shelf above the changing table.  I needed stuff to go ON that shelf, and one of the things I had in mind was a cute holder for all of her hair clippies.  So I made one.  With stuff I already had around my house, so it cost me $0.00.

Want to make one, too?  I wrote up a little tutorial for you all!  But don't get too excited, this is really common sense...

*Gather your supplies.  An old picture frame (mine was 11x14, which I think was the perfect size), a piece of fabric bigger than your frame (mine was cut from an old sheet), ribbon or ric rac or both, something to "pad" your frame with (I used a scrap of terry cloth - a scrap of batting would be great, too), and if you want to paint your frame, you'll need sandpaper, paint, and a brush.


*Pop the glass out of your frame.  Either set this aside, or recycle it if you know you'll never use it again.

*If you're going to paint your frame, sand it down lightly to remove the glossy finish.  I often skip this step when I paint stuff, but I'm glad I did it.  There was a marked difference in the sanded/non-sanded areas as I was going along.  Use a fine grit sandpaper (I think mine was 150).


*Use a rag to wipe off the dust after you sand.  You don't want dust gumming up your paint!  I just used an old dishtowel, but if you have tacky cloth at your house, that stuff is awesome.

*Paint your frame.  If you're really smart, you'll use spray paint.  I didn't have any in the color that I wanted, but I did have acrylic craft paint.  So that's what I used.  Remember, I was going for free.  Make sure you paint the insides, too, you'll still see that part.

Like my painting mat?  I just dig in the recycling when I need cardboard to protect a surface.

*Let your paint dry fully.  I let mine dry overnight.  You could still see the woodgrain through the paint, because I only did one coat.  I decided I liked it that way.  If you want your paint opaque, do more coats (duh).

*Grab your fabric and padding.  Center the mat or cardboard from your frame over the padding and wrap it around to the back.


*I used a little bit of tape to secure the fabric back there so it wouldn't wiggle around for the next part.

*Decide how you want your ribbon to go.  I decided I wanted mine all going vertically, but I also considered criss-crossing them like a memo board.


*Flip the whole thing over and secure the ribbons to the back (again, so they don't wiggle around until you get it in your frame).  If you're really crazy, you can get out a ruler and make sure they are equally spaced apart.


*Once all of the ribbon is secure, pop that bad boy back into the frame and secure all the tabs down.  If you saved your glass, you could put it back in the back there where no one will ever see it.


*Voila!  You are done!  Go load it up with all the girly-cuteness that hair clippies are.  And do a little happy dance because I know how to spell "voila".  It really makes me stabby when I see "whalla!" and other horrible butchery of the word.


Saturday, September 8, 2012

Finished - Whoooo Hat

It's been quite a while since I've made anything more substantial than a headband.  A good friend of mine recently had a baby boy, and I wanted to make him a hat for a gift.  This little boy has an older sister, too, and I didn't want her to feel left out, so I wanted to make her a hat also.  I could just make them different hats, but I wanted them to have something similar, that worked well for boys and girls.

Enter the whoooo hat.  At least that's what we call it.


This one's for Ruby.  I'd never made this pattern before, so lucky her, she gets my prototype!  I wasn't too sure about how it would turn out, and I made several modifications to the pattern along the way, but I love it. 

My husband insisted on putting her in that onesie today.  Ugh.

And she's got plenty of room to wear it all winter.  Now I just have to make two more!


The pattern can be found on Ravelry here.